Individual Training Courses, Online E-Course Training
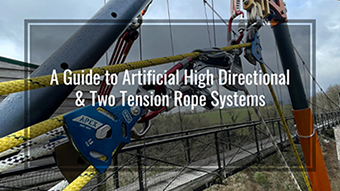
A Guide to Artificial High Directionals & Two Tension Rope Systems
$59.00
Welcome to A Guide to Artificial High Directionals & Two Tension Rope Systems! By enrolling in this course, you’ve shown a commitment to a higher level of learning. Be prepared to be challenged!. The “normal” rules of rope rescue will be looked at through a critical eye in order to force you to think critically and make decisions based on applied theories of force, compression, and tension.
We’ll cover, in detail, the two tension system that has become commonplace in rope rescue. We’ll also explore many different configurations for Artificial High Directionals. If before enrolling in this course you were thinking, “I have equipment… I need to know more about but nowhere to get the information I need”, then you certainly won’t be saying that after working your way through each of the units inside this course.
Learn to safely and effectively deploy your Artificial High Directional and solve complex problems with confidence and competence.
About the Course
A Guide to Artificial High Directionals & Two Tension Rope Systems delves into information beyond what the standard rope technician has been taught in initial training. Inside, we encourage students to think critically about a wide variety of applications with an emphasis on high directional usage.
What You’ll Learn
Inside this course, we’ll cover topics like…
Two Tension Systems
High Directional Configurations (Vortex, Terradaptor, and Vector)
High Angle Offsets
And more!
Course Curriculum
Unit 1: Welcome
1.1 Welcome
1.2 Video: Interview with Jason Ilowite
1.3 Video: Interview with Craig McClure
1.4 Course Materials
1.5 Course Equipment Overview: CMC MPD
1.6 Video Tutorial: Course Equipment CMC MPD Overview
1.7 Course Equipment Overview: Petzl I’D
1.8 Video Tutorial: Course Equipment Petzl I’D Overview
Unit 2: Two Rope Offset System Overview – Strong Side Emphasis (SA Frame)
2.1 Two Rope Tension System A-Frame Resultant Insight, Part 1
2.2 Video Tutorial: Two Rope Tension System A-Frame Resultant Insight, Part 1
2.3 Two Rope Tension System A-Frame Resultant Insight, Part 2
2.4 Video Tutorial: Two Rope Tension System A-Frame Resultant Insight, Part 2
2.5 Two Rope Tension System Overview – Strong Side
2.6 Video Tutorial: Two Rope Tension System Overview – Strong Side
2.7 Two Rope Tension System Portuguese Bowline Guying System Insight
2.8 Video Tutorial: Two Rope Tension System Portuguese Bowline Guying System Insight
2.9 Quiz
Unit 3: Two Rope Offset: Weak Side Emphasis (Gin Pole)
3.1 Two Rope Tension System Gin Pole Side Overview
3.2 Video Tutorial: Two Rope Tension System Gin Pole Side Overview
3.3 Two Rope Offset Gin Pole Sided Insight
3.4 Video Tutorial: Two Rope Offset Gin Pole Side Insight
3.5 Quiz
Unit 4: Sideways A-Frame
4.1 Sideways Easel A-Frame, Version 1
4.2 Video Tutorial: Sideways Easel A-Frame, Version 1
4.3 Sideways Easel A-Frame Anchor Overview
4.4 Video Tutorial: Sideways Easel A-Frame Anchor Overview
4.5 Sideways Easel A-Frame, Version 2
4.6 Video Tutorial: Sideways Easel A-Frame, Version 2
4.7 Sideways Easel A-Frame Resultant Insight
4.8 Video Tutorial: Sideways Easel A-Frame Resultant Insight
4.9 Quiz
Unit 5: Dynamic Directional Offset
5.1 Dynamic Directional: Building A 9:1 System Using 2 x 3:1 Systems Insights
5.2 Video Tutorial: Dynamic Directional: Building a 9:1 System Using 2 x 3:1 Systems Insights
5.3 Dynamic Directional Connection Point Insight
5.4 Video Tutorial: Dynamic Directional Connection Point
5.5 Dynamic Directional Jag Directional Insight
5.6 Video Tutorial: Dynamic Directional Jag Directional Insight
5.7 Dynamic Directional Main Side, Part 1
5.8 Video Tutorial: Dynamic Directional Main Side, Part 1
5.9 Dynamic Directional Main Side, Part 2 (Includes Both Sides)
5.10 Video Tutorial: Dynamic Directional Main Side, Part 2 (Includes Both Sides)
5.11 Dynamic Directional: A-Frame Resultant Effect Insight
5.12 Video Tutorial: Dynamic Directional: A-Frame Resultant Effect Insight
5.13 Dynamic Directional: A-Frame Resultant Effect with High Anchors Insight
5.14 Video Tutorial: Dynamic Directional: A-Frame Resultant Effect with High Anchors Insight
5.15 Dynamic Directional: A-Frame Resultant Effect with Low Anchors Insight
5.16 Video Tutorial: Dynamic Directional: A-Frame Resultant Effect with Lower Anchors Insight
5.17 Quiz
Unit 6: SMC Vector Backcountry Gin Pole
6.1 SMC Vector Gin Pole Overview
6.2 Video Tutorial: SMC Vector Gin Pole Overview
6.3 SMC Vector Gin Pole Insight
6.4 Video Tutorial: SMC Vector Gin Pole Insight
6.5 Quiz
Unit 7: Wrap Up
7.1 Wrap Up
7.2 Gear Buying Guide
Added Perks
Additional features Rigging Lab Academy Members are enjoying
Certificate of Completion
Download your personalized Certificate of Completion after completing the course.
100% Self-Paced
Go through the course material as fast or as slow as you’d like.
Private Discussion Board
Ask questions, meet other students, and even chat with the course instructor.